- Client
- Walker Home Pros, a home inspection business in the Sacramento area, run by Matt Walker
- What we built
- The website and its request form, and Walker Inspector, a phone app for booking, inspecting and sending reports
- Also in the project
- Logo, favicon and a print kit
Homeowners and buyers ask for an inspection on the website. Matt books the job in his phone app, the customer confirms online, and Matt inspects the house and sends the report from the same app. Both tools run on the business’s own WordPress website, so there’s nothing to download from an app store.
Below, one sample customer goes from the request through booking and confirmation. A finished sample inspection then shows the report.
How it works
The screenshots come from a private demo copy of the site and app. The customers, agents, email addresses, phone numbers and addresses in them are made up, and the inspection photos are drawings. A test mailbox caught every email, so none were sent.
Step 1: A homeowner asks for an inspection
Who: the buyer or homeowner, on the Walker Home Pros website.
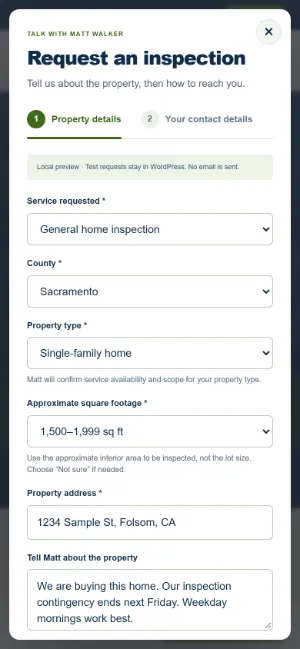
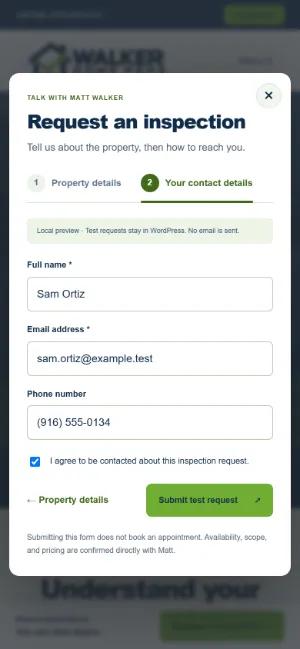
- They tap Request an inspection. A short form opens over the page in two steps: the property first, then their name, email and phone.
- The form says plainly that sending it doesn’t book an appointment. Matt confirms the details himself.
- They see “Request received” without leaving the page.
What happens automatically
- The website saves the request first, privately, so it isn’t lost if an email fails.
- Then it emails Matt the details.
- A spam check screens each request. A doubtful one is still saved and marked for Matt to check.
Step 2: Matt sees the new request
Who: Matt, on his phone or computer.
- Matt signs in to Walker Inspector. It runs in the phone’s browser, and he adds it to his iPhone Home Screen like any other app. “Remember Me” keeps his phone signed in for 30 days.
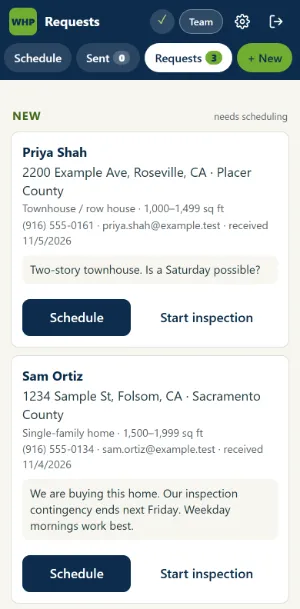
- New requests appear on the app’s Requests tab with a count, and on the Home screen under Website requests.
- Each card shows the property, size, contact details and the customer’s message, with two buttons: Schedule and Start inspection.
- The same requests are also listed in WordPress.
Step 3: Matt books the appointment
Who: Matt, in the app.
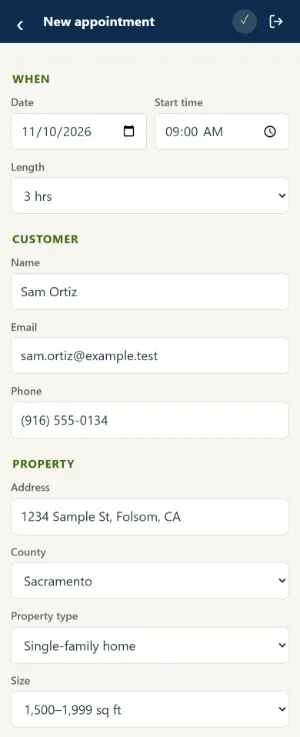
- He taps Schedule on the request. The appointment form fills itself in from the request: name, email, phone, address, county, property type and size.
- The app suggests a length based on the home’s size, and copies the customer’s message into Matt’s private notes.
- Matt picks the date and time. He can add the buyer’s agent and a note for the email. If the time overlaps another job, the app warns him.
- He taps Save & send confirmation.
What happens automatically
- The buyer gets a “Please confirm your home inspection” email with a Confirm appointment button. The agent gets it too if Matt ticks “Send to the agent too”.
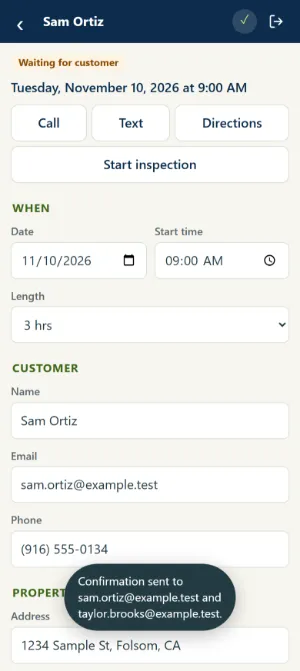
- The appointment shows Waiting for customer.
- A history on the appointment records each step with the time.
Step 4: The customer confirms
Who: the buyer or their agent. Either one can confirm.
- The email shows the time, address, inspector and Matt’s note, with a Confirm appointment button.
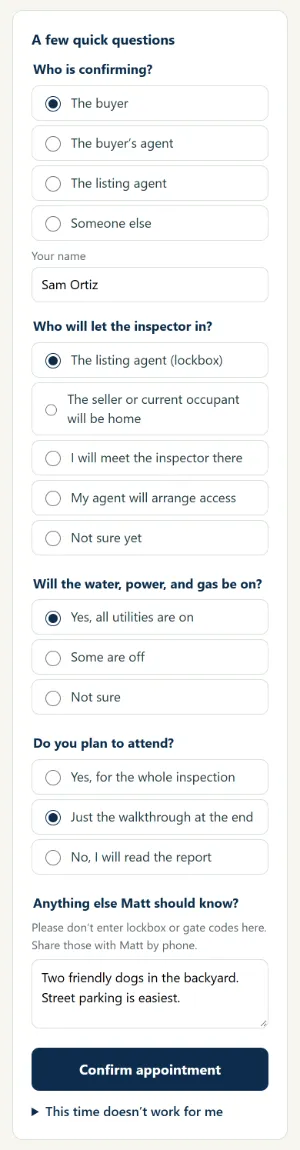
- The button opens a private page for that appointment. It asks who is confirming, who will let the inspector in, whether the utilities will be on, whether they’ll attend, and anything else Matt should know.
- The page asks people not to type lockbox or gate codes. They share those with Matt by phone.
- After confirming, they see “You’re all set”, with links to add the appointment to Apple, Outlook or Google Calendar.
- If the time doesn’t work, they tap “This time doesn’t work for me” and suggest better times. Matt gets an email, and his Reschedule button sends a new time to confirm.
What happens automatically
- The buyer and agent get a “You’re all set” email with the calendar links.
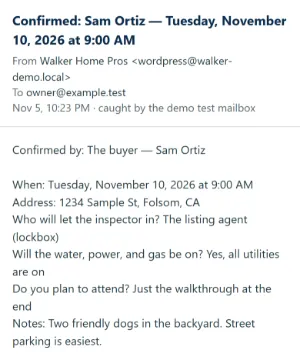
- Matt gets a short email with who confirmed and their answers.
- The appointment changes to Confirmed.
Step 5: The job is on Matt’s schedule
Who: Matt, in the app.
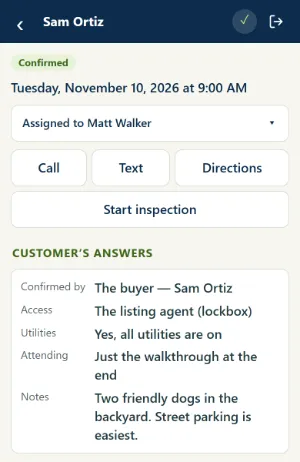
- The confirmed appointment shows the customer’s answers at the top, with buttons to Call, Text, get Directions and Start inspection.
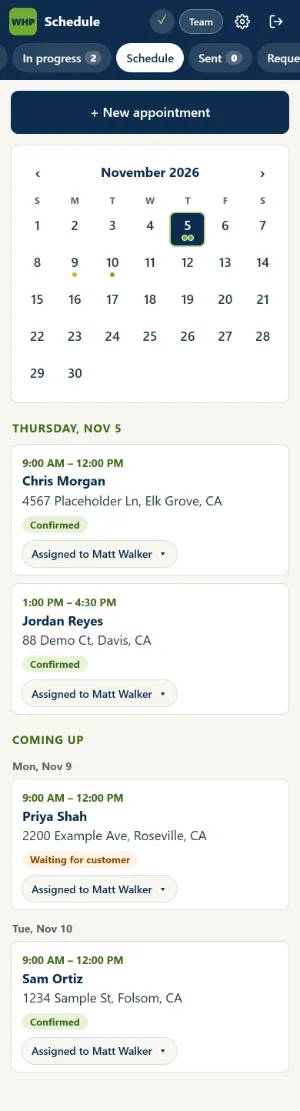
- The Schedule tab has a month calendar, the selected day’s jobs and a Coming up list, each with its status.
- Each job has an Assigned to button, so Matt can hand a job to another inspector on his team.
What happens automatically
- The day before a confirmed inspection, the customer gets a reminder email.
- An inspector gets an email when a job is assigned to them, moved or cancelled.
- Inspectors on the team see only their own jobs. They can fill out reports, and Matt sends them.
Step 6: Matt inspects the house on his phone
Who: Matt, at the house.
- From the appointment, he taps Start inspection. The report starts with the customer, agent, address and time filled in.
- Conditions on the day, such as who attended and the weather, are quick taps.
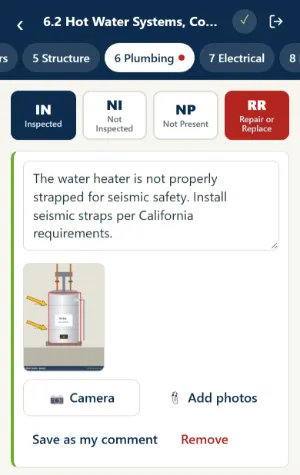
- The report follows Matt’s own template, with 10 sections from Roofing to Appliances. Each item gets one tap: IN (inspected), NI (not inspected), NP (not present) or RR (repair or replace). “Mark all as IN” handles the routine items.
- Matt picks from his standard comments or types his own. “Save as my comment” keeps new wording for next time.
- He adds photos from the camera or photo library, then draws arrows, boxes and circles to point out the problem.
What happens automatically
- Every tap is saved on the phone and uploaded in the background. A check mark at the top shows when everything is saved.
- With no signal, the work waits on the phone and uploads later.
- The phone shrinks each photo before saving it.
Step 7: Matt reviews and sends the report
Who: Matt, when the report is done, often the same day.
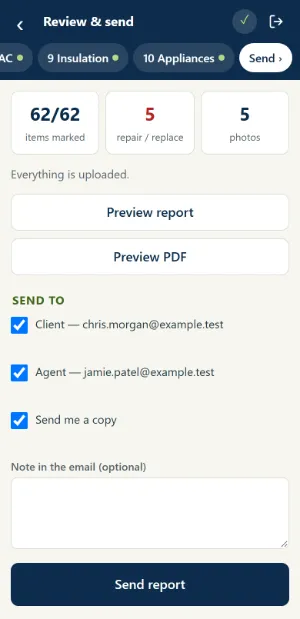
- Review & send shows how many items are marked, how many need repair, and how many photos there are.
- It warns about anything missing, such as unmarked items, no client email or no cover photo.
- Matt can preview the web report and the PDF. He chooses who gets it (the client, the agent, a copy to himself), adds a note if he likes, and taps Send report.
What happens automatically
- Each person gets an email with a link to the report and a link to the PDF.
- The app records when the report was sent and to whom.
- The report link starts working when Matt sends it. The link is long and hard to guess, and search engines are told not to list it.
- An inspector on the team taps Submit for review instead, and Matt gets an email.
Step 8: The client reads the report
Who: the client and their agent, on a phone or computer.
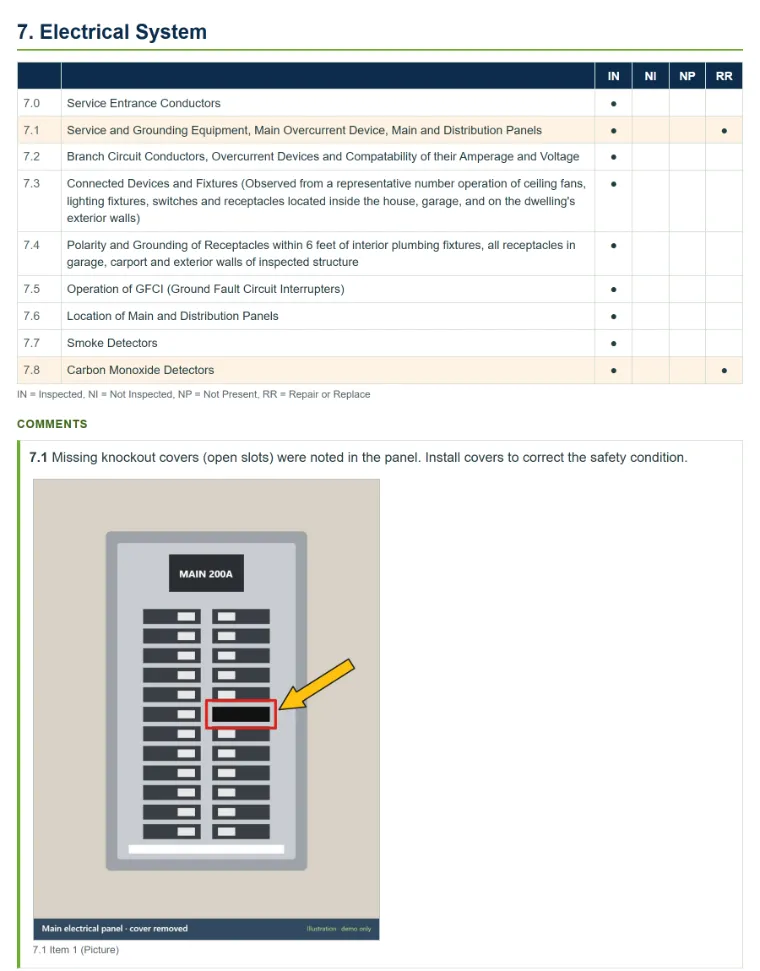
- The web report has the cover photo, the inspection details, and a section for each part of the house with Matt’s comments and marked-up photos.
- At the end, a Summary gathers every item marked Repair or Replace in one place.
- The PDF is the same report as a branded, page-numbered file. The website builds it on its own server.
What we built
- A custom WordPress theme, with pages the owner can edit in the normal editor.
- A request form that saves every request in WordPress before it sends the email, with spam protection.
- Service-area pages for the towns it serves, and a booking page for the booking link on its Google listing.
- Walker Inspector, a phone app that runs in the browser and can be added to the home screen, with website requests and appointments in the same place.
- Booking with a customer confirmation page, calendar links and reminder emails.
- Home inspection reports with photos and markup, sent to the client as a web page and a PDF.
- Logo, favicon, and a print kit with the logo in each color and a business card design.
Results
These come from the website. We list results only where we measured them.
- Homepage on a phone with a slow network: main content about 2.6 s, down from 5.7 s. Page size 571 KB, down from 1,033 KB.
- Accessibility: axe, an automated accessibility checker, found one issue before our speed and accessibility work and 0 after, including with the request form open.
Other case study: JPG Insurance, AI chat with live agents
All our work